Repair kerosene fan heater
Tweet1. Miss ignition
I use a fan heater to warm my room. This heater was made by Dainichi in 2005 and is called Blue Heater. The type is FW-321S.- Max output : 3.20 kW
- Max burning kerosene : 0.311 L/h
- Tank capacity : 5.0 L
Disassemble and clean carburetor
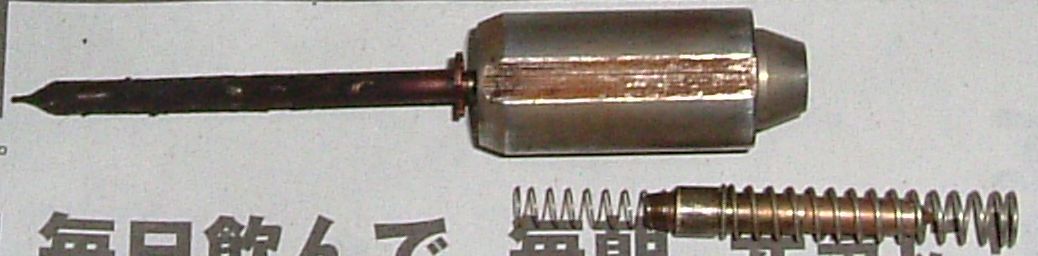
Fig.1 Sticked pitch and dirt
I removed two bind M4 screws and loosened two union nuts to take out the carburetor. I also unconnected four wiring connectors.
I removed a plug with O-ring. A tappet with two springs came out. I found out a tiny retainer ring. But
the needle did not come out. An hour or two hours later I found a lot of white sand on the newspaper. The sand appeared
because kerosene evaporated. I shocked the cylindrical case on the kitchen table again and again... Sand came out
again. The inner came near. I pulled out by nipper. I show the disassembled armature with a needle. I removed a
E-ring. I hesitated to polish the armature by sand paper. I feared to decrease gap. I soaked it in kerosene and
polished in cloth. The dark dirt is not erosion but something. The needle was sticked with black pitch. The tip is too
thin to polish.
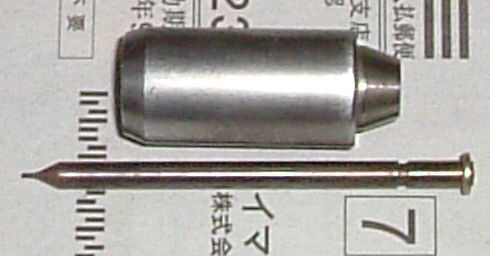
Fig.2 Polished and burned
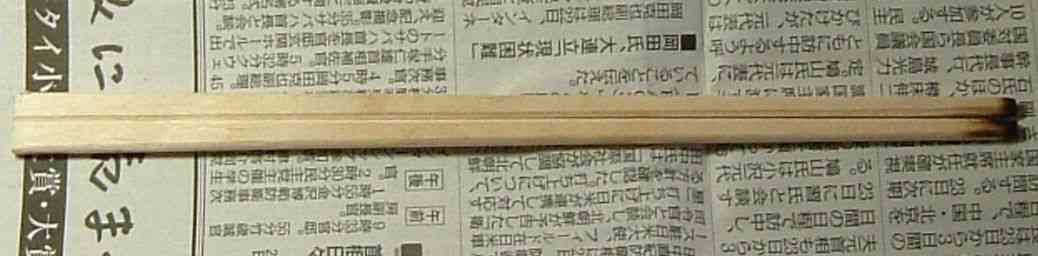
Fig.3 Burned waribashi
I burned it by stove burner. It burned easily because it was carbon. The outer of the carburetor cannot burn by stove.
I pinched the needle by disposal chop stick. The type of chop stick is called waribashi. Waribashi is made of woods.
Therefore it insulates heat. The tip was burned black. I inserted the assembled needle with two springs and removed.
I removed the needle and found needle covered with thin tar. I repeated a few times. I pushed springs many times.
The needle began to move in smooth. I assembled the plug. I pushed the tip of needle by nail. The needle was pushed
and came out off nail. It took a time to assemble the carburetor on the frame. The bracket to position the caburetor
of SUS was difficult for me.
Burn test
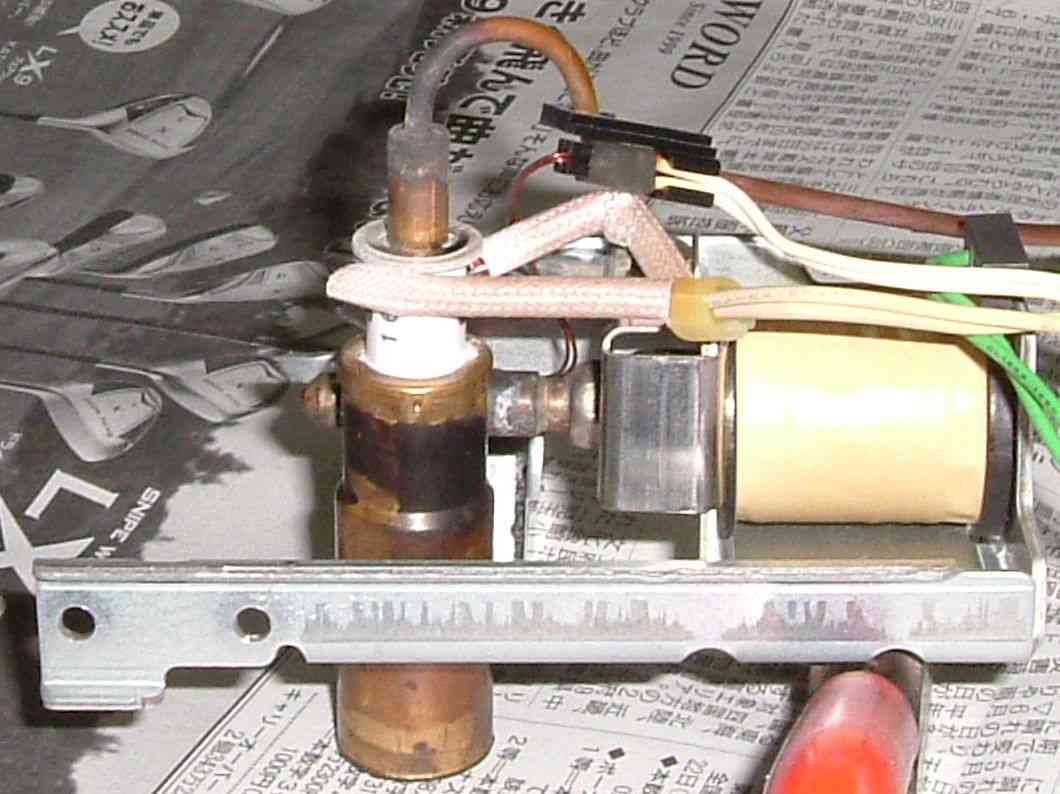
Fig.5 Assembly
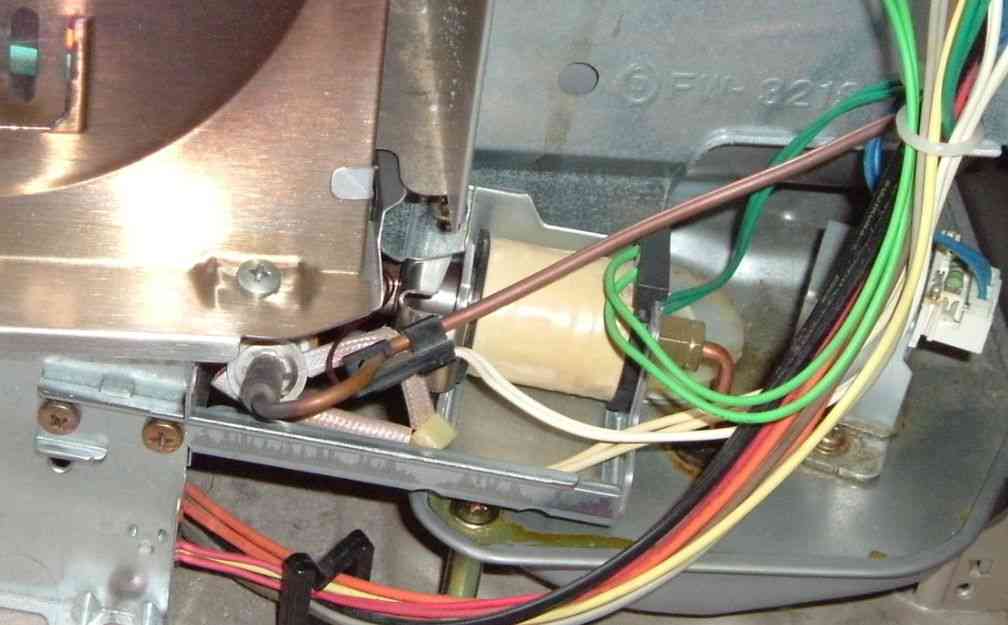
Fig.6 Burn test
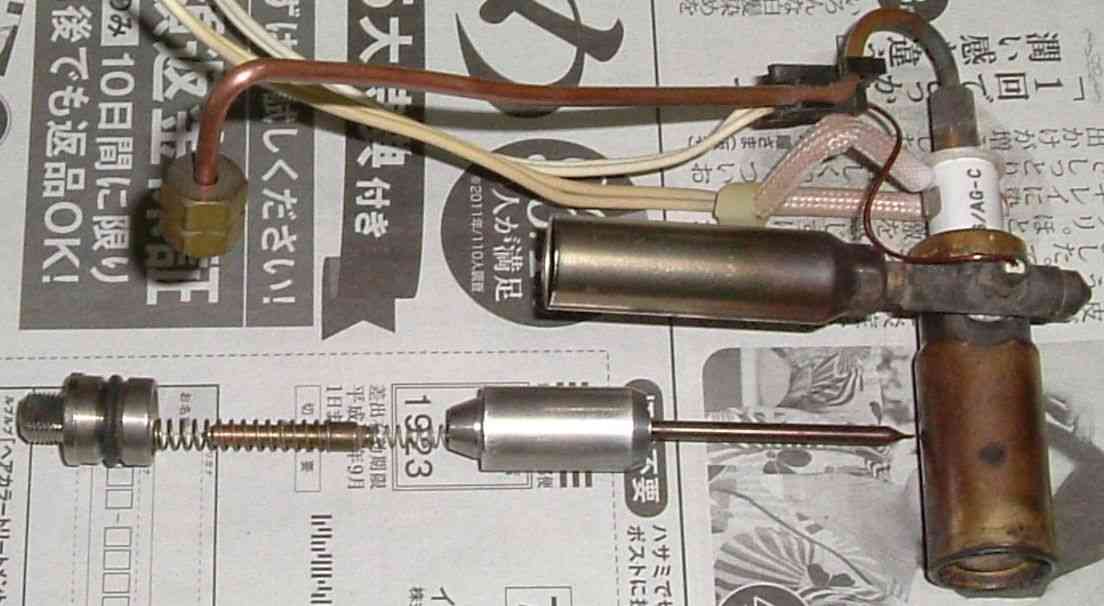
Fig.4 Disassembled
I tell how the caburetor works in the disassembled photo. Kerosene is transfered to the top of the caburetor by copper
pipe witn union nut. The kerosene is heated by electricity. You see the two knit sleeved wirings. The other thin
wirings is to measure temperature, I think. The kerosen is mixed with air in the cyrindrical brass chamber. If coil
current is on, the steel armature is pulled with the needle and orifice is open. The mist flows from the orifice to the
bottom of burner. The extra kerosene not to be mist returns through plug and drain pipe.
I inserted the tip of caburetor in the burner and attached another bracket to fix the caburetor. I also connected four connectors. I pluged AC line and turned on. The heater ignitioned well. I turned off and turned on. The heater failed to ignite. I pressed run twice. Although I have to press run five times now, it improved 10 times before. And the heater burns stable with minimum heating. It could not control to burn constantly. It made noise with pulse before.
I cleaned the burner net by wire brush and filed tip surface of flame rod again. The result is the same as before.
Mystery of silica
Fig.7 Silica
I collected silica, silica came out when I disassembled the caburetor. If the silica came from air, it would be found
in the exit of warm air. I have seen them in the heaters by Sanyo and Sharp.
Burner
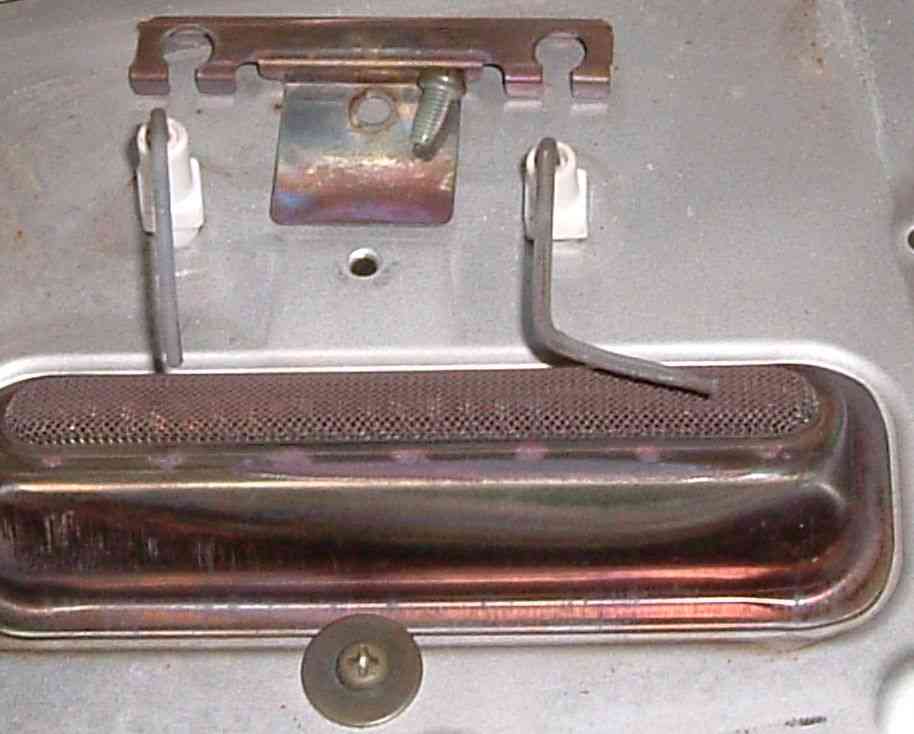
Fig.8 Ignite and flame rod
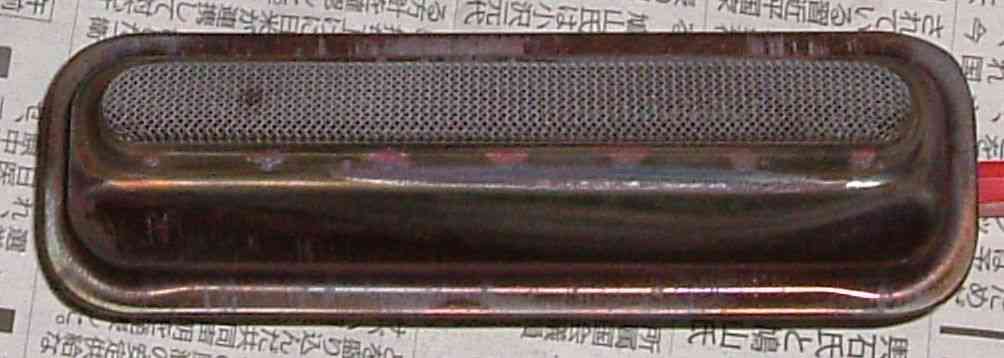
Fig.9 Burner
Fig.8 shows ignite rod and flame rod. The right one is the flame rod. I filed it. I removed the burner and
cleaned by steel wire brush. The metal net might be rusted. I remembered Sharp adopted ceramic burner. The bottom of
Dainichi's burner is made of heat conductive alminum. Mist of kerosene with air enters from the right bottom and flows
through U shape passage. It is reasonable and would be cheap except for life.
Fuel pump

Fig.10 Pump Assy
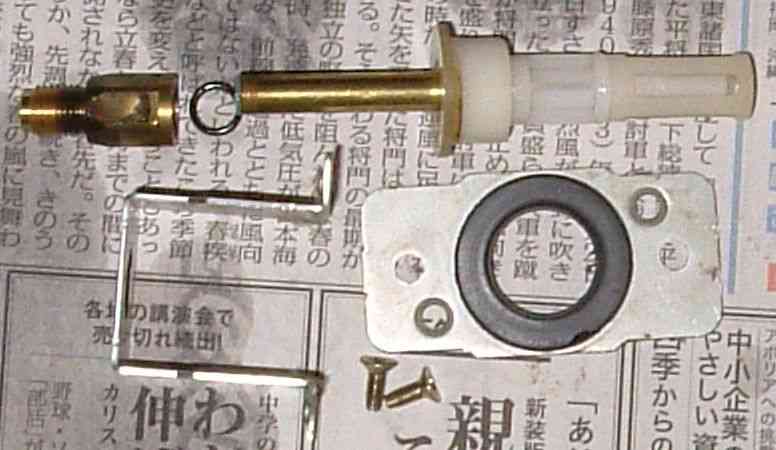
Fig.11 Valve
The kerosene fan heater fails to ignite five times. I habe been doubtful for detecting flame, otherwise I suppose
that fuel may not be enough to ignite. I loosened a union nut and two bind screws. I removed the fuel pump. I saw dust
in the tip of it. I removed it. I ran and the heater fired at once. A few days later, the heater needs five times to
ignite. A site shows the principle of magnetic pump in animation.[6]
15:54 Apr03 GMT+9
I disassembled the fuel pump. The valve is in the brass cylinder. The outlet hole is smaller than inlet. If I could disassemble and clean the cylinder, The fuel pump would repair.
15:54 Apr03 GMT+9
I disassembled the fuel pump. The valve is in the brass cylinder. The outlet hole is smaller than inlet. If I could disassemble and clean the cylinder, The fuel pump would repair.
- Dainichi blue heater kikaki shurihou
- Dainichi sekiyu fan heater FW-5590L bunkai seisou
- Fan heater kikaki? needle valve souji
- Kikai no kaibou
- Fan heater shuri
- Tei youseki-gata denji pump toha
2. Miss fire again in 2015

Fig.2-1 Fixed needle

Fig.2-2 Burner side view

Fig.2-3 Burner top view
バーナの構造は良く考えられて設計されている。熱伝導が良いアルミと銅が使用されている。プレス加工品だ。
ほこり堆積 Piled dust

Fig.2-1 Uncover the front cover

Fig.2-2 The inside front cover

Fig.2-3 Removed the burner base
[2-1] 石油ファンヒータの故障と購入
Biwa Lake JAPAN
© 2012 - 2016 Enoki